This installation process requires no coding. Simply follow each step carefully.
Prerequisites
| Requirement | Recommended |
|---|---|
| Web Hosting | cPanel / Plesk / VPS / XAMPP / WAMP |
| PHP Version | 7.4 – 8.2 Supported |
| Database | MySQL / MariaDB |
| SSL Certificate | Optional but recommended |
✅ Step 1: Upload Files
- Download the file:
eventmie-pro-webinstaller.zip - Extract the ZIP on your computer.
- Upload the extracted files to your server directory:
public_html (for live websites) www (for local servers) htdocs (for XAMPP) laravel_project_root/ (for custom hosting) - Ensure all files are properly uploaded.
✅ Step 2: Create Database
- Go to your hosting cPanel or Plesk.
- Open:
MySQL® Databases - Create a new database, user, and assign full privileges.
Example credentials to keep ready:
| Key | Example |
|---|---|
| Database Name | eventmie_db |
| Database User | eventmie_user |
| Password | StrongPassword123 |
✅ Step 3: Configure .env File
Go to your project root and open the .env file.
Update these values:
DB_DATABASE=eventmie_db
DB_USERNAME=eventmie_user
DB_PASSWORD=StrongPassword123
Save the file.
If
.envfile does not exist → copy.env.exampleto.env
✅ Step 4: Run the Web Installer
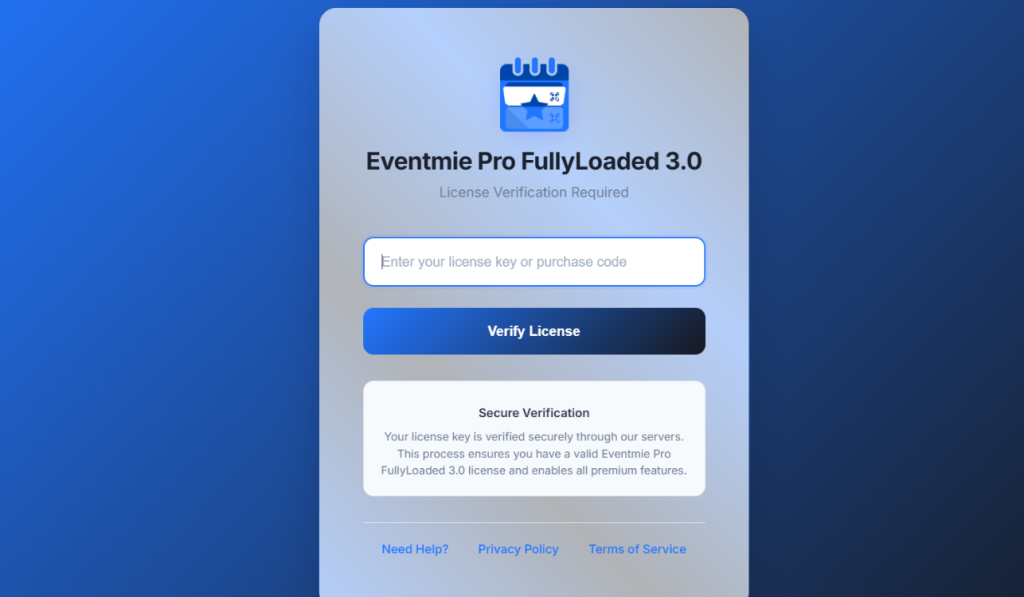
Open your website URL in any browser:
https://yourdomain.com
You will now see the License Verification Screen.
Enter:
✔ License Key / Purchase Code
✔ Click Verify License
✅ Step 5: Start Guided Installation Wizard

You will see the multi-step installer interface.
Step-1: Check Requirements
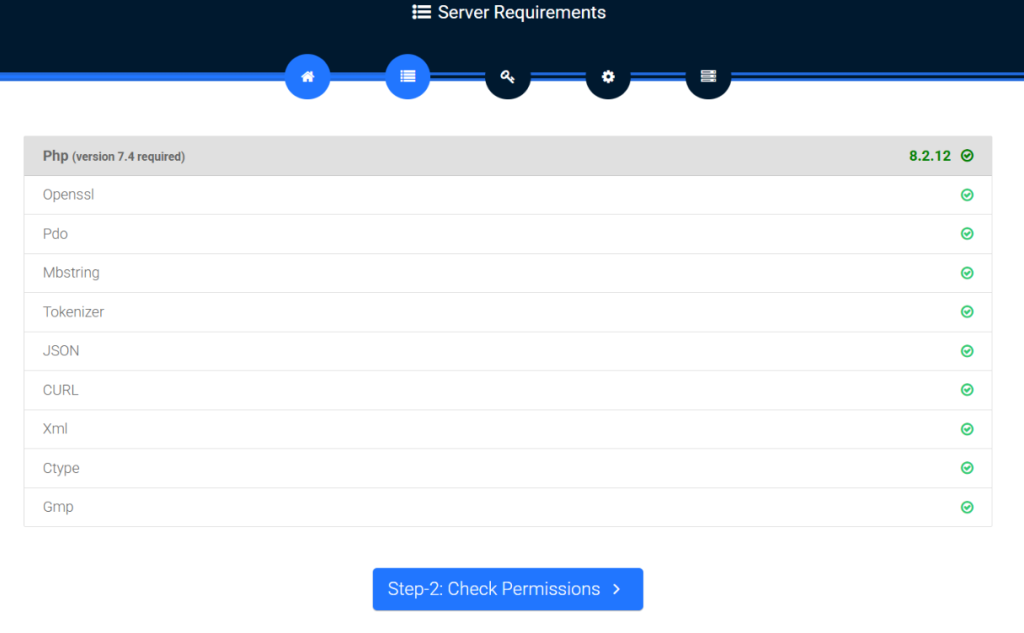
Installer checks server modules such as:
- PHP version
- OpenSSL
- PDO
- JSON
- cURL
- Mbstring
- XML
- GMP
If all show ✅ proceed to next.
Click:
Step-2: Check Permissions
✅ Step-6: Folder Permissions
Ensure these folders are writable:
| Folder | Permission |
|---|---|
| storage/framework/ | 775 or 777 |
| storage/logs/ | 775 or 777 |
| bootstrap/cache/ | 775 or 777 |
If all ✅ → click:
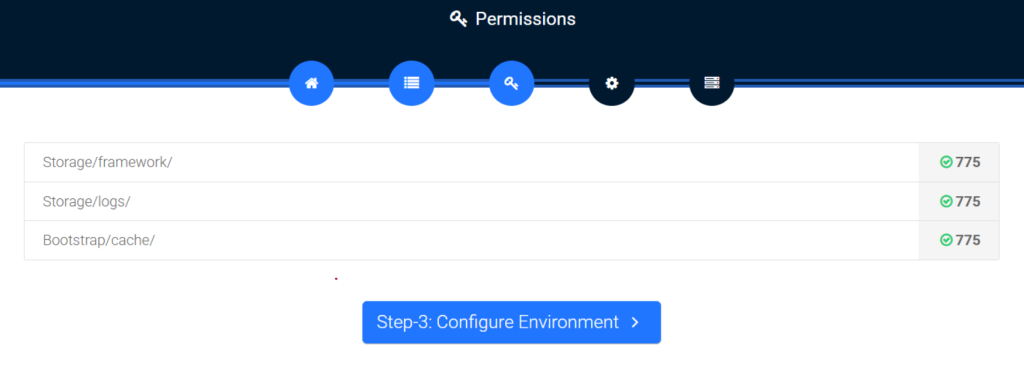
Step-3: Configure Environment
✅ Step-7: App Configuration
Fill fields:
| Field | Example |
|---|---|
| App Name | Events Pro FullyLoaded |
| App Environment | production |
| App Debug | false (set true only for development) |
| App URL | https://yourdomain.com |
Click:
Step-5: Setup Database
✅ Step-8: Database Setup
Enter your database details from Step-2:
| Field | Value |
|---|---|
| Database Host | 127.0.0.1 |
| Database Port | 3306 |
| Database Name | eventmie_db |
| Database Username | eventmie_user |
| Database Password | StrongPassword123 |
Click:
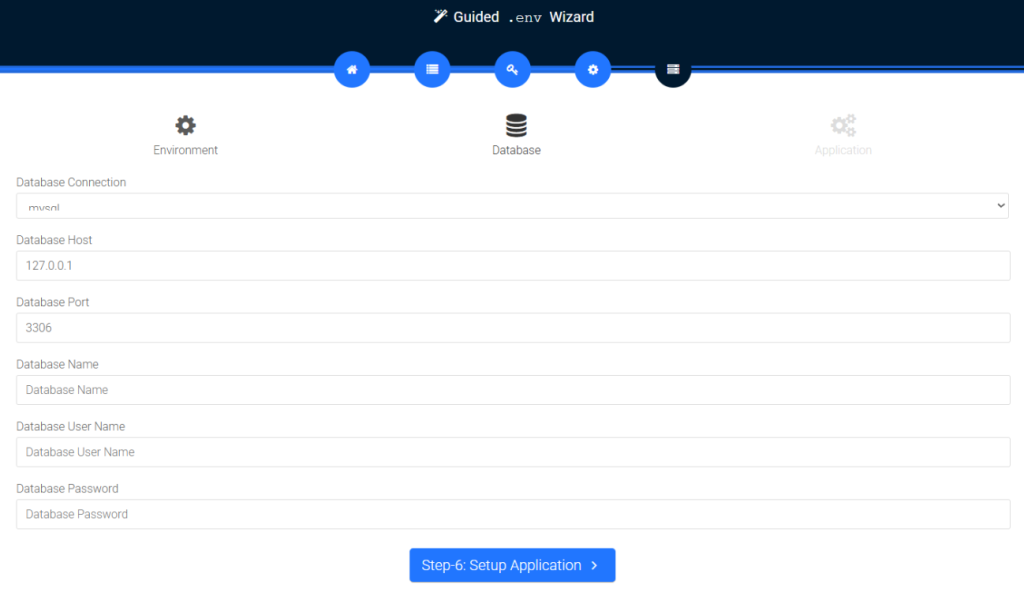
Step-6: Setup Application
✅ Step-9: Migration & Seeding
The installer will automatically:
- Migrate database tables
- Insert demo data (users, events, categories, banners, etc.)
- Configure core system modules
You will see:
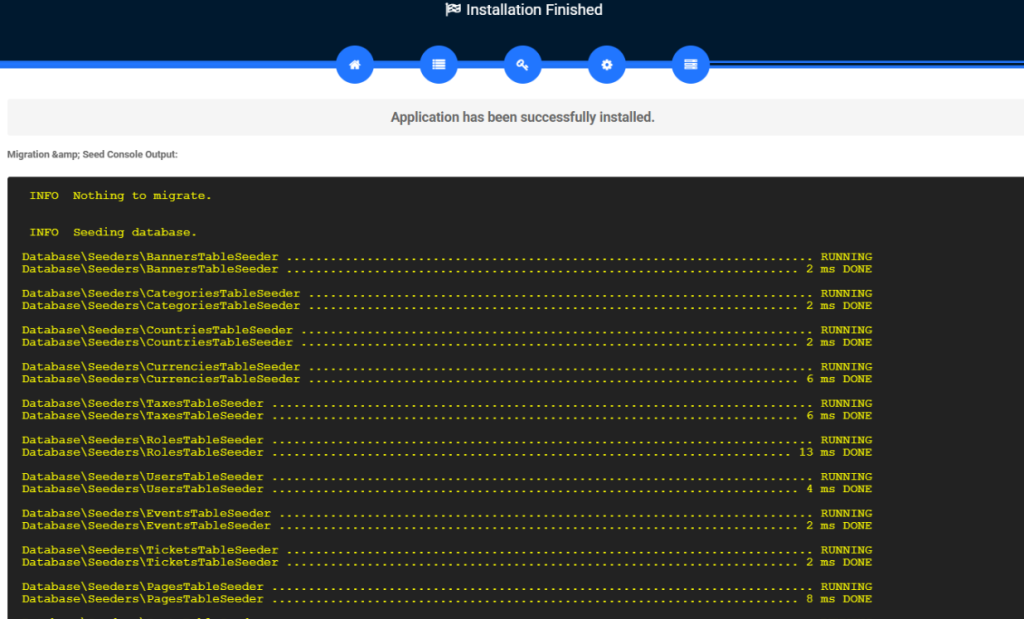
Application has been successfully installed.
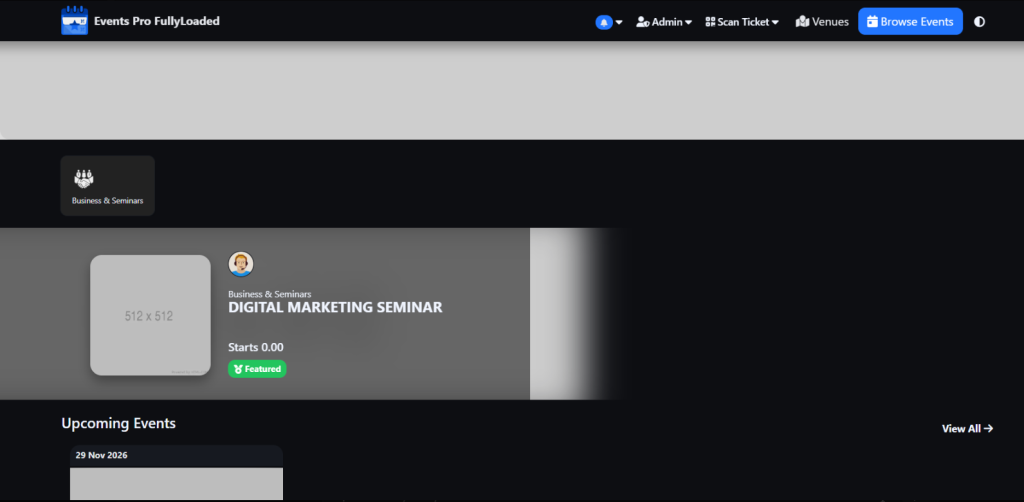
✅ Step-10: Installation Complete
You will be redirected to the Website Home Page.
You can now:
✔ Browse Events
✔ Add Events / Venues
✔ Allow Users to Register & Buy Tickets
✔ Manage Admin Dashboard
🎉 Installation Successful!
Your Eventmie Pro FullyLoaded 3.0 system is now live and ready to use.
🔑 Default Admin Login (If Provided)
Visit:
https://yourdomain.com/login
Login with admin email/password configured during setup.
🛠 Need Customization Help?
I can now help you with:
| Feature | Status |
|---|---|
| Remove “Powered By” Footer | ✅ Available |
| Setup Payment Gateways (Razorpay / Stripe / PayPal) | ✅ Available |
| Multi-Event City Portals (Like BookMyShow) | ✅ Available |
| Brand Your Logo & Theme | ✅ Available |
| Facebook / Google Login | ✅ Available |

I’m Abhishek, a DevOps, SRE, DevSecOps, and Cloud expert with a passion for sharing knowledge and real-world experiences. I’ve had the opportunity to work with Cotocus and continue to contribute to multiple platforms where I share insights across different domains:
-
DevOps School – Tech blogs and tutorials
-
Holiday Landmark – Travel stories and guides
-
Stocks Mantra – Stock market strategies and tips
-
My Medic Plus – Health and fitness guidance
-
TrueReviewNow – Honest product reviews
-
Wizbrand – SEO and digital tools for businesses
I’m also exploring the fascinating world of Quantum Computing.
Best Cardiac Hospitals Near You
Discover top heart hospitals, cardiology centers & cardiac care services by city.
Advanced Heart Care • Trusted Hospitals • Expert Teams
View Best Hospitals