I will give you an illustration of how to set up phpMyAdmin in Ubuntu. This guide will demonstrate how to install PHPMyAdmin with Ubuntu 20.04 and Apache2. This post will provide a straightforward example of installing phpMyAdmin on an Ubuntu server. I simply described how to install phpmyadmin on Ubuntu in step-by-step fashion. Let us take the 18.04 Ubuntu server installation of phpMyAdmin as an example.
Here, I will outline the commands you need to use to install phpMyAdmin in Ubuntu 21.10, 21.04, 20.04, 18.04, and 16.04 step-by-step. So let us install phpMyAdmin by running the following command.
Update Local Package:
sudo apt updateInstall MySQL Server:
sudo apt install mysql-serverInstall Phpmyadmin:
sudo apt install phpmyadmin php-mbstring php-zip php-gd php-json php-curlCreate User on MySQL:
you can create new user for mysql by using following query:
mysql -u root -p

CREATE USER 'root_new'@'localhost' IDENTIFIED BY 'rootnewpassword';

GRANT ALL PRIVILEGES ON * . * TO 'root_new'@'localhost';

FLUSH PRIVILEGES;
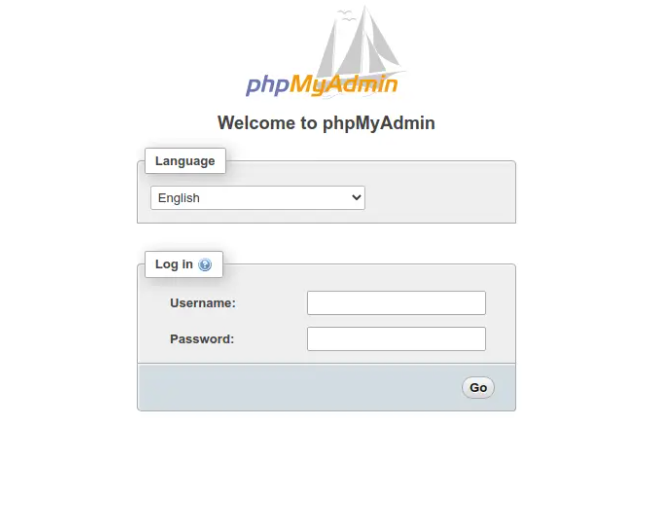
Now you can go to your browser and open IP or localhost then you will found bellow layout:
http://localhost/localhost/phpmyadmin

http://your_domain_or_IP/phpmyadmin
Output:


I’m Abhishek, a DevOps, SRE, DevSecOps, and Cloud expert with a passion for sharing knowledge and real-world experiences. I’ve had the opportunity to work with Cotocus and continue to contribute to multiple platforms where I share insights across different domains:
-
DevOps School – Tech blogs and tutorials
-
Holiday Landmark – Travel stories and guides
-
Stocks Mantra – Stock market strategies and tips
-
My Medic Plus – Health and fitness guidance
-
TrueReviewNow – Honest product reviews
-
Wizbrand – SEO and digital tools for businesses
I’m also exploring the fascinating world of Quantum Computing.
Best Cardiac Hospitals Near You
Discover top heart hospitals, cardiology centers & cardiac care services by city.
Advanced Heart Care • Trusted Hospitals • Expert Teams
View Best Hospitals