Here’s a comprehensive guide to creating a CRUD (Create, Read, Update, Delete) application using Express.js, React.js, and MongoDB. This guide will cover the backend setup (with Express and MongoDB) and the frontend setup (with React). The full-stack application will allow you to perform CRUD operations
1. Backend Setup (Express.js and MongoDB)
Step 1: Initialize the Node.js Project
- Open your terminal or command prompt, and navigate to the folder where you want to create the project:
mkdir express-react-mongo-crud cd express-react-mongo-crud - Initialize a new Node.js project:
npm init -y
Step 2: Install Dependencies
Install the necessary backend dependencies using npm:
npm install express mongoose cors dotenv
express: Web framework for Node.js.mongoose: MongoDB ORM to interact with MongoDB.cors: To enable cross-origin resource sharing.dotenv: To manage environment variables (e.g., MongoDB URI).
Step 3: Set Up Express Server
- Create the
server.jsfile in the root directory of the project:touch server.js - Add the following code to
server.jsto set up Express and MongoDB:
const express = require('express'); const mongoose = require('mongoose'); const cors = require('cors'); require('dotenv').config(); // For environment variables // Initialize the app const app = express(); // Set up middleware app.use(cors()); app.use(express.json()); // For parsing JSON data // MongoDB connection mongoose.connect(process.env.MONGO_URI, { useNewUrlParser: true, useUnifiedTopology: true }) .then(() => console.log('MongoDB connected')) .catch((err) => console.log('MongoDB connection error: ' + err)); // Define routes const itemRoutes = require('./routes/items'); app.use('/api/items', itemRoutes); // Basic route to check server app.get('/', (req, res) => { res.send('Hello World'); }); // Start the server const port = process.env.PORT || 5000; app.listen(port, () => { console.log(`Server running on port: ${port}`); });- Create a
.envfile to store your MongoDB URI:touch .env - Add the following MongoDB connection string to the
.envfile (adjust for your MongoDB instance):MONGO_URI=mongodb://localhost:27017/crud_app
Step 4: Create MongoDB Model
- Create a
modelsfolder to store the database models:mkdir models - Create a
Item.jsfile inside themodelsfolder:touch models/Item.js - Add the following code to define the
Itemmodel inItem.js:const mongoose = require('mongoose'); const itemSchema = new mongoose.Schema({ name: { type: String, required: true }, description: { type: String, required: true }, }); module.exports = mongoose.model('Item', itemSchema);
Step 5: Create Routes for CRUD Operations
- Create a
routesfolder to store the route definitions:mkdir routes - Create a
items.jsfile inside theroutesfolder:touch routes/items.js - Add the following CRUD routes to
items.js:
const express = require('express'); const Item = require('../models/Item'); const router = express.Router(); // Create a new item router.post('/', async (req, res) => { const { name, description } = req.body; try { const newItem = new Item({ name, description }); await newItem.save(); res.status(201).json(newItem); } catch (error) { res.status(500).json({ error: error.message }); } }); // Get all items router.get('/', async (req, res) => { try { const items = await Item.find(); res.status(200).json(items); } catch (error) { res.status(500).json({ error: error.message }); } }); // Get a single item router.get('/:id', async (req, res) => { try { const item = await Item.findById(req.params.id); if (!item) return res.status(404).json({ error: 'Item not found' }); res.status(200).json(item); } catch (error) { res.status(500).json({ error: error.message }); } }); // Update an item router.put('/:id', async (req, res) => { try { const updatedItem = await Item.findByIdAndUpdate(req.params.id, req.body, { new: true }); if (!updatedItem) return res.status(404).json({ error: 'Item not found' }); res.status(200).json(updatedItem); } catch (error) { res.status(500).json({ error: error.message }); } }); // Delete an item router.delete('/:id', async (req, res) => { try { const deletedItem = await Item.findByIdAndDelete(req.params.id); if (!deletedItem) return res.status(404).json({ error: 'Item not found' }); res.status(200).json({ message: 'Item deleted' }); } catch (error) { res.status(500).json({ error: error.message }); } }); module.exports = router;- Now your backend is set up to handle CRUD operations for items.
2. Frontend Setup (React.js)
Step 1: Create the React App
- Open a new terminal, navigate to the root folder of your project, and create a new React app inside the
clientfolder:npx create-react-app client cd client - Install Axios to handle HTTP requests:
npm install axios
Step 2: Create Items.js Component
- Inside the
srcfolder of your React app (client/src), create a new file namedItems.js:touch src/Items.js - Add the following code to
Items.jsfor fetching and displaying items:
import React, { useState, useEffect } from 'react'; import axios from 'axios'; const Items = () => { const [items, setItems] = useState([]); const [name, setName] = useState(''); const [description, setDescription] = useState(''); const [editingItem, setEditingItem] = useState(null); // Fetch all items from backend useEffect(() => { axios.get('http://localhost:5000/api/items') .then(response => setItems(response.data)) .catch(error => console.log(error)); }, []); // Add a new item const handleAddItem = () => { axios.post('http://localhost:5000/api/items', { name, description }) .then(response => { setItems([...items, response.data]); setName(''); setDescription(''); }) .catch(error => console.log(error)); }; // Handle editing an item const handleEditItem = (item) => { setEditingItem(item); setName(item.name); setDescription(item.description); }; // Update an item const handleUpdateItem = () => { axios.put(`http://localhost:5000/api/items/${editingItem._id}`, { name, description }) .then(response => { setItems(items.map(item => (item._id === response.data._id ? response.data : item))); setEditingItem(null); setName(''); setDescription(''); }) .catch(error => console.log(error)); }; // Delete an item const handleDeleteItem = (id) => { axios.delete(`http://localhost:5000/api/items/${id}`) .then(() => setItems(items.filter(item => item._id !== id))) .catch(error => console.log(error)); }; return ( <div> <h1>CRUD Application</h1> <input type="text" value={name} onChange={(e) => setName(e.target.value)} placeholder="Item name" /> <input type="text" value={description} onChange={(e) => setDescription(e.target.value)} placeholder="Item description" /> <button onClick={editingItem ? handleUpdateItem : handleAddItem}> {editingItem ? 'Update Item' : 'Add Item'} </button> <ul> {items.map(item => ( <li key={item._id}> {item.name} - {item.description} <button onClick={() => handleEditItem(item)}>Edit</button> <button onClick={() => handleDeleteItem(item._id)}>Delete</button> </li> ))} </ul> </div> ); }; export default Items;Step 3: Update App.js to Render Items Component
- Open
src/App.jsand update it to include theItemscomponent:import React from 'react'; import './App.css'; import Items from './Items'; function App() { return ( <div className="App"> <Items /> </div> ); } export default App;
Step 4: Run React and Express Servers
- In your
clientfolder, run the React development server:npm start - In the root folder, run the Express backend server:
node server.js
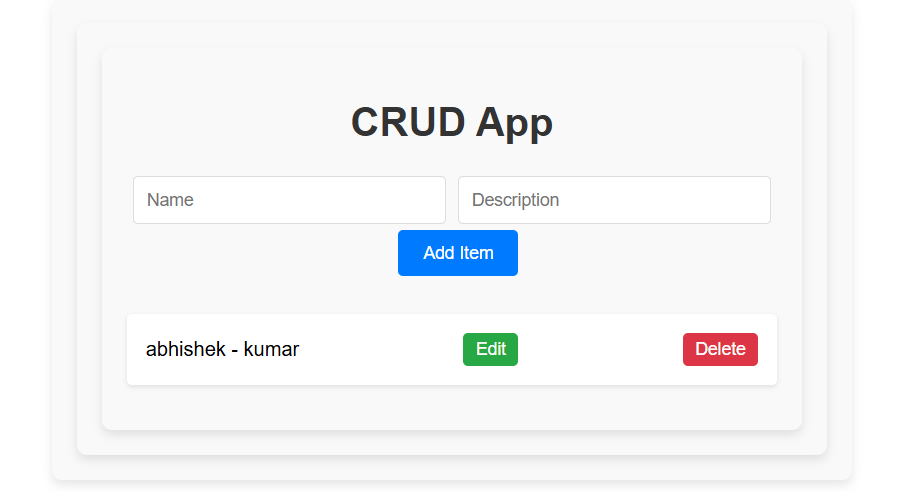
OutPut:
Summary
- Backend: Set up Express and MongoDB to handle CRUD operations via API routes (
/api/items). - Frontend: Created a React component (
Items.js) to interact with the backend, using Axios for HTTP requests to perform CRUD actions (add, update, delete, fetch items). - Running both servers: Use
npm startfor the React frontend andnode server.jsfor the backend server.
You now have a full-stack CRUD application with Express, React, and MongoDB. Let me know if you need further help or clarification!

I’m Abhishek, a DevOps, SRE, DevSecOps, and Cloud expert with a passion for sharing knowledge and real-world experiences. I’ve had the opportunity to work with Cotocus and continue to contribute to multiple platforms where I share insights across different domains:
-
DevOps School – Tech blogs and tutorials
-
Holiday Landmark – Travel stories and guides
-
Stocks Mantra – Stock market strategies and tips
-
My Medic Plus – Health and fitness guidance
-
TrueReviewNow – Honest product reviews
-
Wizbrand – SEO and digital tools for businesses
I’m also exploring the fascinating world of Quantum Computing.
Best Cardiac Hospitals Near You
Discover top heart hospitals, cardiology centers & cardiac care services by city.
Advanced Heart Care • Trusted Hospitals • Expert Teams
View Best Hospitals